

Key Takeaways
Proper exposure is about finding the right balance between these three settings.
Aperture controls depth of field and how much light reaches the sensor.
Exposure in photography determines the brightness of an image and is controlled by aperture, shutter speed, and ISO.
Shutter speed affects motion blur and how much light enters the camera.
ISO determines the camera’s sensitivity to light and impacts image noise.
How to Understand Exposure
Understanding Exposure: Balancing Light and Camera Settings
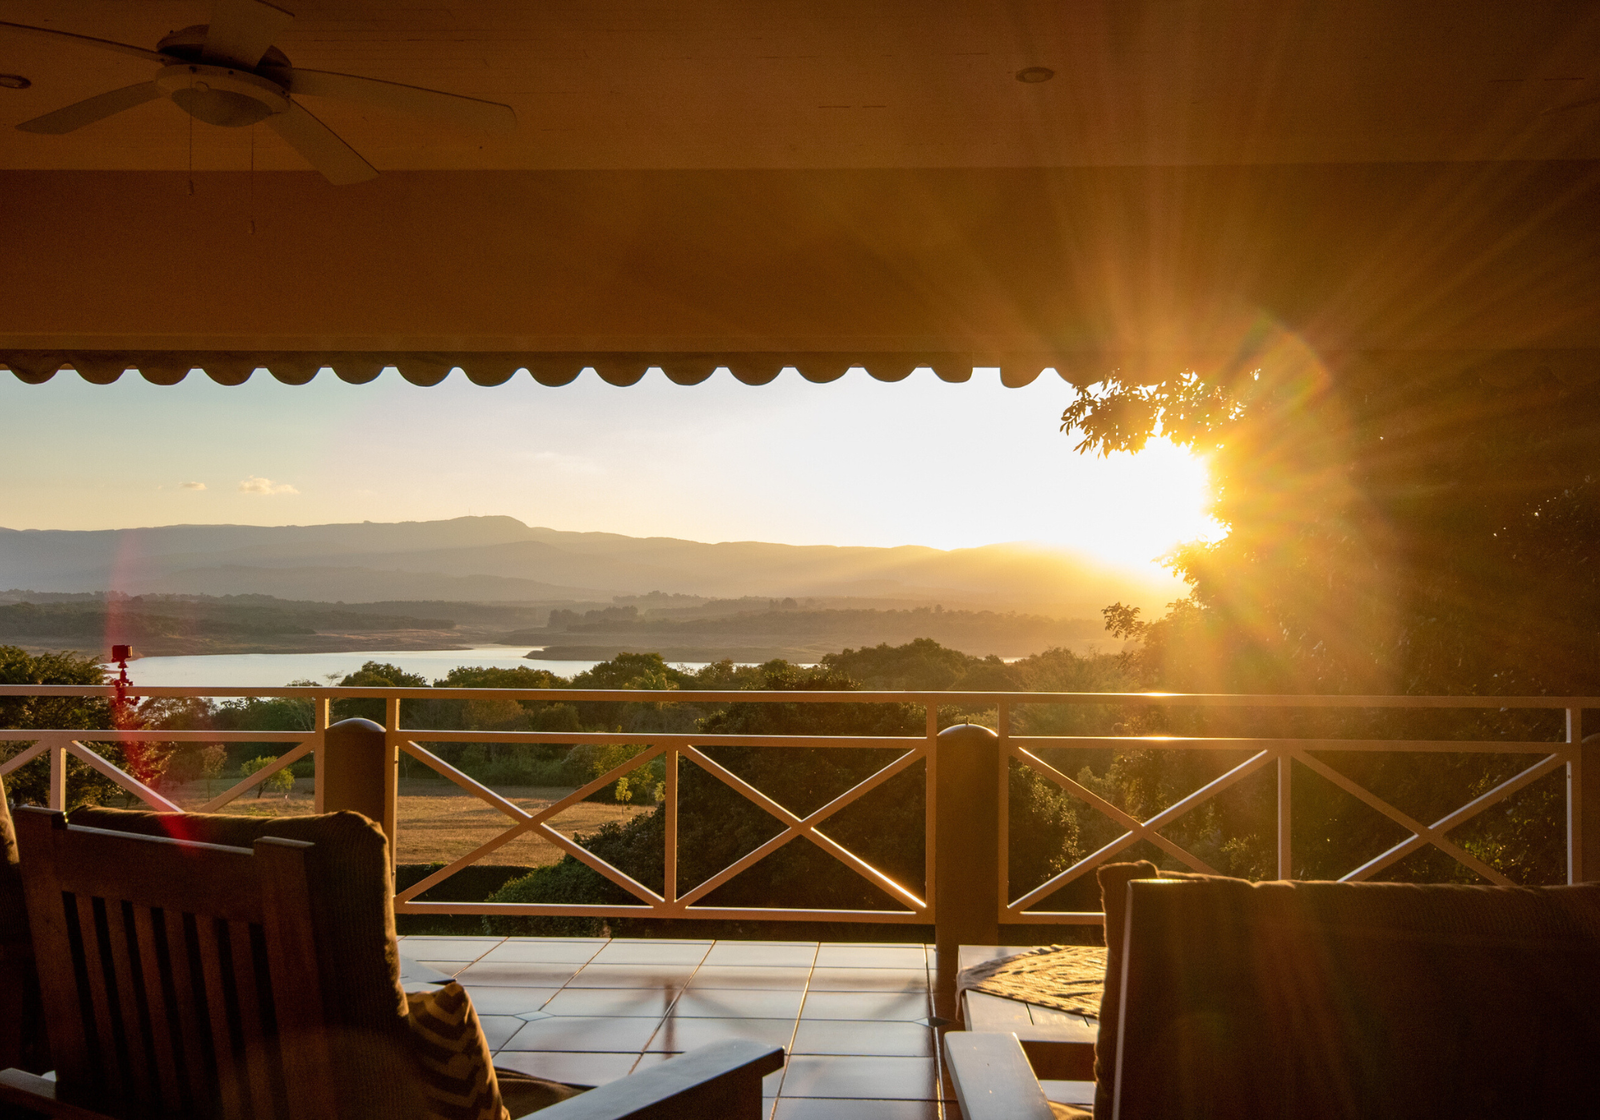
Exposure is the foundation of photography. It determines how much light enters the camera and affects the brightness of your image. To achieve a well-exposed photo, you need to find the right balance between three key camera settings: aperture, shutter speed, and ISO. These settings control how much light reaches the camera sensor and influence the overall look of your photos. Too much light can wash out details, while too little light can make your subject disappear into darkness. Mastering exposure helps you capture images that are clear, vibrant, and full of detail.
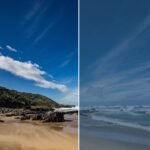
Seeing the impact of exposure adjustments can make learning easier. If you take the same photo at different exposure settings, you’ll notice how changes in light affect the final image. A bright, overexposed photo might make a sky look completely white, while an underexposed version of the same scene might turn it almost black. A correctly exposed photo retains details in both the bright sky and darker foreground. By experimenting with different settings, you can train your eye to recognise exposure issues and make quick corrections while shooting.
What is Exposure?
Exposure is simply the amount of light that reaches your camera’s sensor. It determines how bright or dark your photo will be. If too much light enters the camera, the image will be too bright (overexposed), and if too little light enters, the image will be too dark (underexposed). The goal is to find the right balance to create a clear, well-lit photo.
Why Proper Exposure Matters
Getting the right exposure is important because it helps capture details in both the bright and dark areas of your photo. If an image is overexposed, the highlights (bright areas) can lose detail and appear completely white. If it’s underexposed, shadows can turn too dark, making it hard to see important parts of the image. A well-exposed photo keeps details visible in both shadows and highlights, making your image look natural and balanced.
The Three Settings That Control Exposure
There are three main camera settings that control exposure: aperture, shutter speed, and ISO. Aperture controls how much light passes through the lens. Shutter speed determines how long the sensor is exposed to light. ISO adjusts the camera’s sensitivity to light. These three settings work together to determine the final exposure of your photo, and adjusting one will often require changes to the others to maintain a balanced image.
Adjusting Exposure for Different Lighting Conditions
Lighting conditions change depending on where and when you’re taking photos. Bright sunlight requires different settings than a dimly lit indoor scene. For example, when shooting in low light, you might need to increase your ISO or use a wider aperture to let in more light. On a sunny day, you may need a faster shutter speed to prevent overexposure. Understanding how to adjust these settings for different environments helps you capture well-exposed images in any situation.
Manual and Automatic Exposure Control
You can control exposure manually by adjusting the aperture, shutter speed, and ISO yourself, but many cameras also offer semi-automatic modes to help. Aperture Priority (A or Av mode) lets you set the aperture while the camera adjusts the shutter speed. Shutter Priority (S or Tv mode) allows you to set the shutter speed while the camera adjusts the aperture. These modes give you creative control while still letting the camera help balance the exposure. Learning to use both manual and semi-automatic modes will make it easier to capture well-exposed photos in any setting.
The Exposure Triangle: The Key to Mastering Exposure
To control exposure effectively, you need to understand the Exposure Triangle, which consists of aperture, shutter speed, and ISO. These three elements work together to determine how much light reaches your camera sensor. Aperture controls how much light enters through the lens, shutter speed determines how long the sensor is exposed to light, and ISO adjusts the sensor’s sensitivity to light. Changing one setting affects the others, so finding the right combination is essential for capturing well-exposed photos. Once you grasp how these three elements interact, you’ll have full creative control over your images, whether you’re shooting in bright daylight or low-light conditions.

Shutter speed
Shutter speed determines how long the camera sensor is exposed to light.
Aperture
Aperture controls how much light enters through the lens.
ISO
ISO adjusts how sensitive the sensor is to light
Understanding the Exposure Triangle: Aperture, Shutter Speed, and ISO Explained
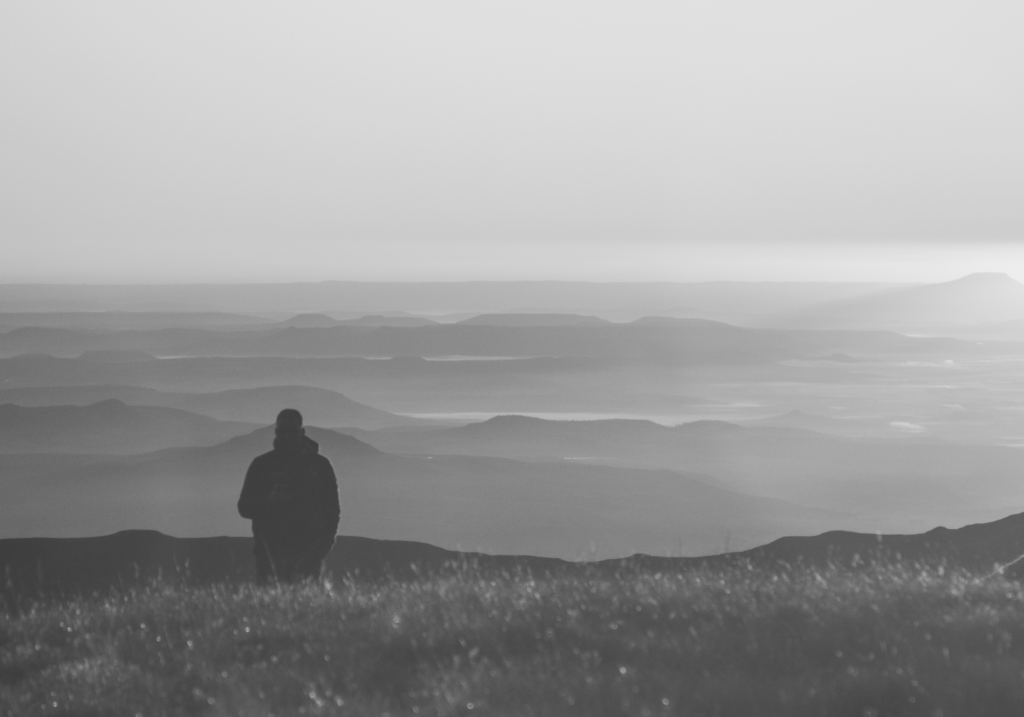
Exposure is the amount of light that reaches your camera’s sensor. It determines how bright or dark your photo will be. Too much light makes an image too bright (overexposed), while too little light makes it too dark (underexposed). Finding the right balance ensures your photo looks natural and well-lit.
Proper exposure helps retain details in both the brightest and darkest parts of an image. If a photo is too bright, the highlights may turn completely white, losing important details. If it’s too dark, shadows may become too deep, hiding parts of the image. A well-exposed photo keeps detail visible in both highlights and shadows, creating a balanced and visually appealing result.
Three key camera settings influence exposure: aperture, shutter speed, and ISO. Aperture controls how much light enters through the lens. Shutter speed determines how long the camera sensor is exposed to light. ISO adjusts how sensitive the sensor is to light. These three settings work together, and adjusting one often requires changes to the others to maintain a proper exposure.
Lighting changes depending on where and when you’re shooting. A bright, sunny day requires different settings than a dim indoor space. In low light, you may need to widen your aperture, slow down your shutter speed, or increase your ISO. In bright conditions, you may need to use a faster shutter speed or lower ISO to prevent overexposure. Understanding how to adjust these settings allows you to capture well-exposed images in any environment.
You can control exposure manually by adjusting the aperture, shutter speed, and ISO yourself. However, most cameras also offer semi-automatic modes to help. Aperture Priority (A or Av mode) lets you choose the aperture while the camera adjusts the shutter speed. Shutter Priority (S or Tv mode) allows you to set the shutter speed while the camera adjusts the aperture. These modes offer creative control while helping you achieve proper exposure more easily
Common Exposure Mistakes Beginners Make and How to Fix Them
- Relying too much on Auto mode and not understanding manual settings.
- Overexposing images by using too slow a shutter speed in bright conditions.
- Underexposing images due to a narrow aperture or low ISO in low-light situations.
- Not checking the histogram for a well-balanced exposure.
- Fixing mistakes by adjusting exposure compensation or shooting in RAW for post-processing flexibility.
Using Exposure Compensation and Light Meters for Accurate Exposures
- Exposure compensation allows adjusting brightness without changing manual settings.
- How to use the camera’s built-in light meter to evaluate exposure.
- When to use exposure compensation (e.g., bright snowy scenes or dark interiors).
- Spot metering vs. evaluative metering: How to choose the right metering mode.
- How to use histograms to ensure a properly exposed image.
Exposure Bracketing Explained: Capturing Multiple Exposures for Perfect Shots
- Exposure bracketing captures multiple shots at different exposure levels.
- Useful for HDR photography and challenging lighting conditions.
- How to enable bracketing on different cameras.
- Example: Taking bracketed shots for sunset photography.
- How to merge bracketed images using editing software.
In Summary

By understanding these settings, you can take full control of your camera and achieve perfectly exposed photos.
Exposure is controlled by the balance of shutter speed, aperture, and ISO.
Aperture affects both light and depth of field, influencing background blur.
A slow shutter speed lets in more light but can cause blur, while a fast shutter speed freezes motion.
ISO determines how much light the sensor needs but introduces noise at high levels.
FAQs About Exposure and Camera Settings
What is the best shutter speed for capturing motion?
The best shutter speed depends on the subject. For fast-moving objects like sports, use a fast shutter speed (1/1000s or faster). For intentional motion blur, like waterfalls, use a slow shutter speed (1/10s or slower).
How do I know if my exposure is correct?
You can check your exposure using the camera’s light meter, histogram, or by reviewing the image on the LCD screen. A well-balanced histogram should not be too far to the left (underexposed) or right (overexposed).


Leave a Comment
You must be logged in to post a comment.